

Design Brief:
Design

Lumbar Procured and Milled


Rip and glue

2nd glue step

Base fabrication

Weld and grind

Always check your 90's


Dry fit


Design Brief:"The goal of the piece is to provide a working surface for the kitchen. The island can either be placed in the middle of the space, or against the wall. The steel frame will allow for rigid-strength with a brushed mill-scale finish providing a light-industrial aesthetic. The Island will have 2 shelves in addition to the butcher block cutting surface at the top. The shelves are designed to hold anything: food, books, dishes, pots, pans. The butcher-block top is designed to wear, and be used. Water marks, cut marks, stains, etc. will provide character."
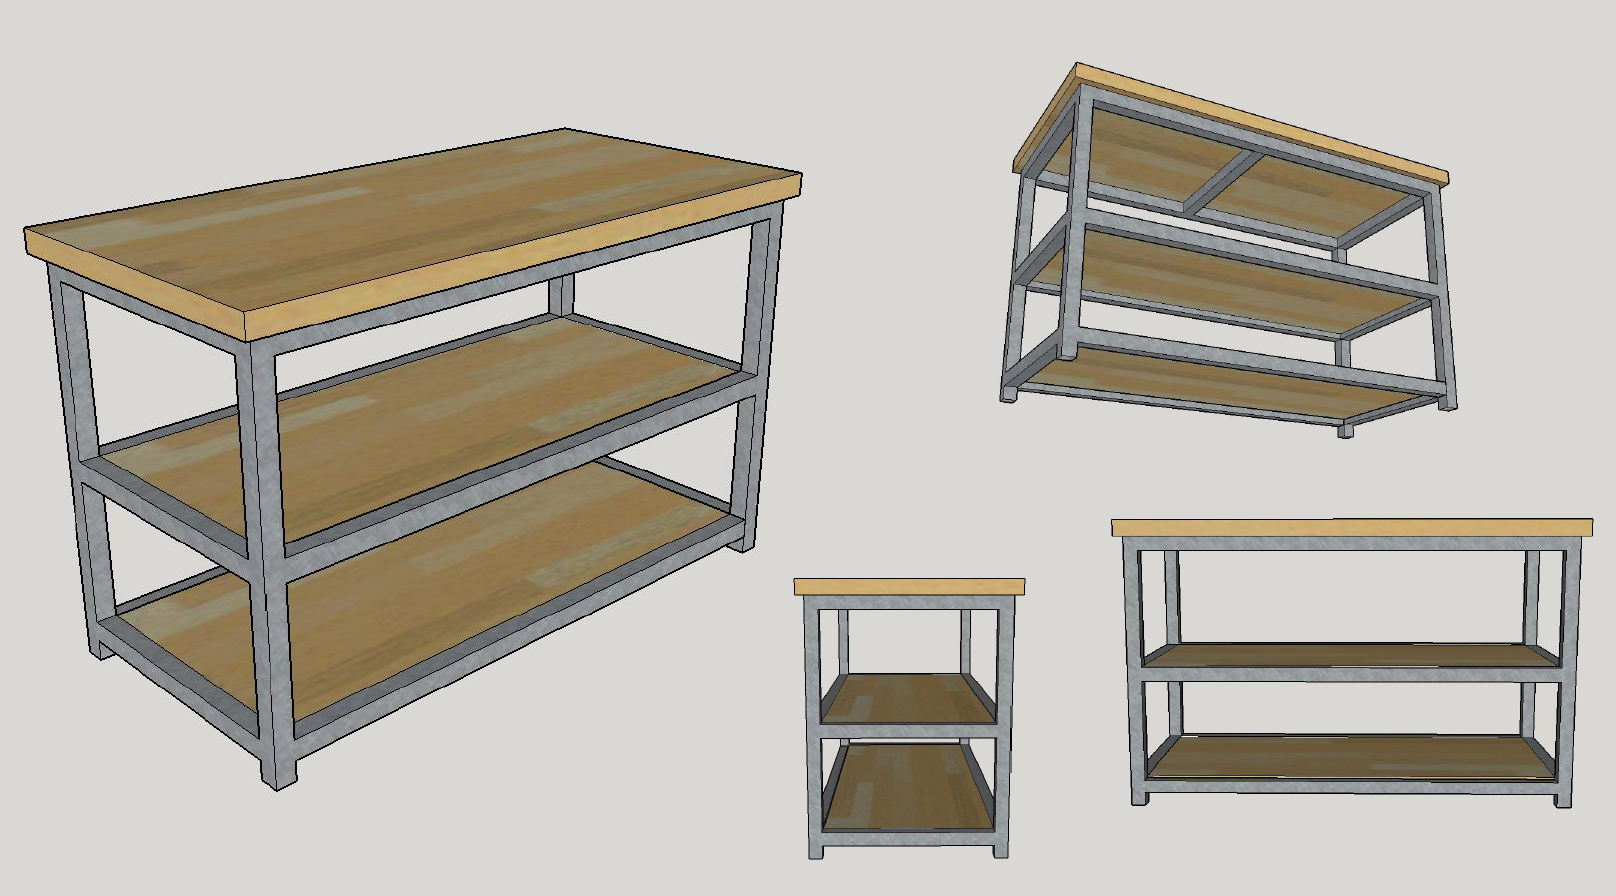
DesignThe CAD drawing helped solidify the perfect [base to top] proportions, and also mock up a lightly brushed mill-scale finish against lighter maple's color.
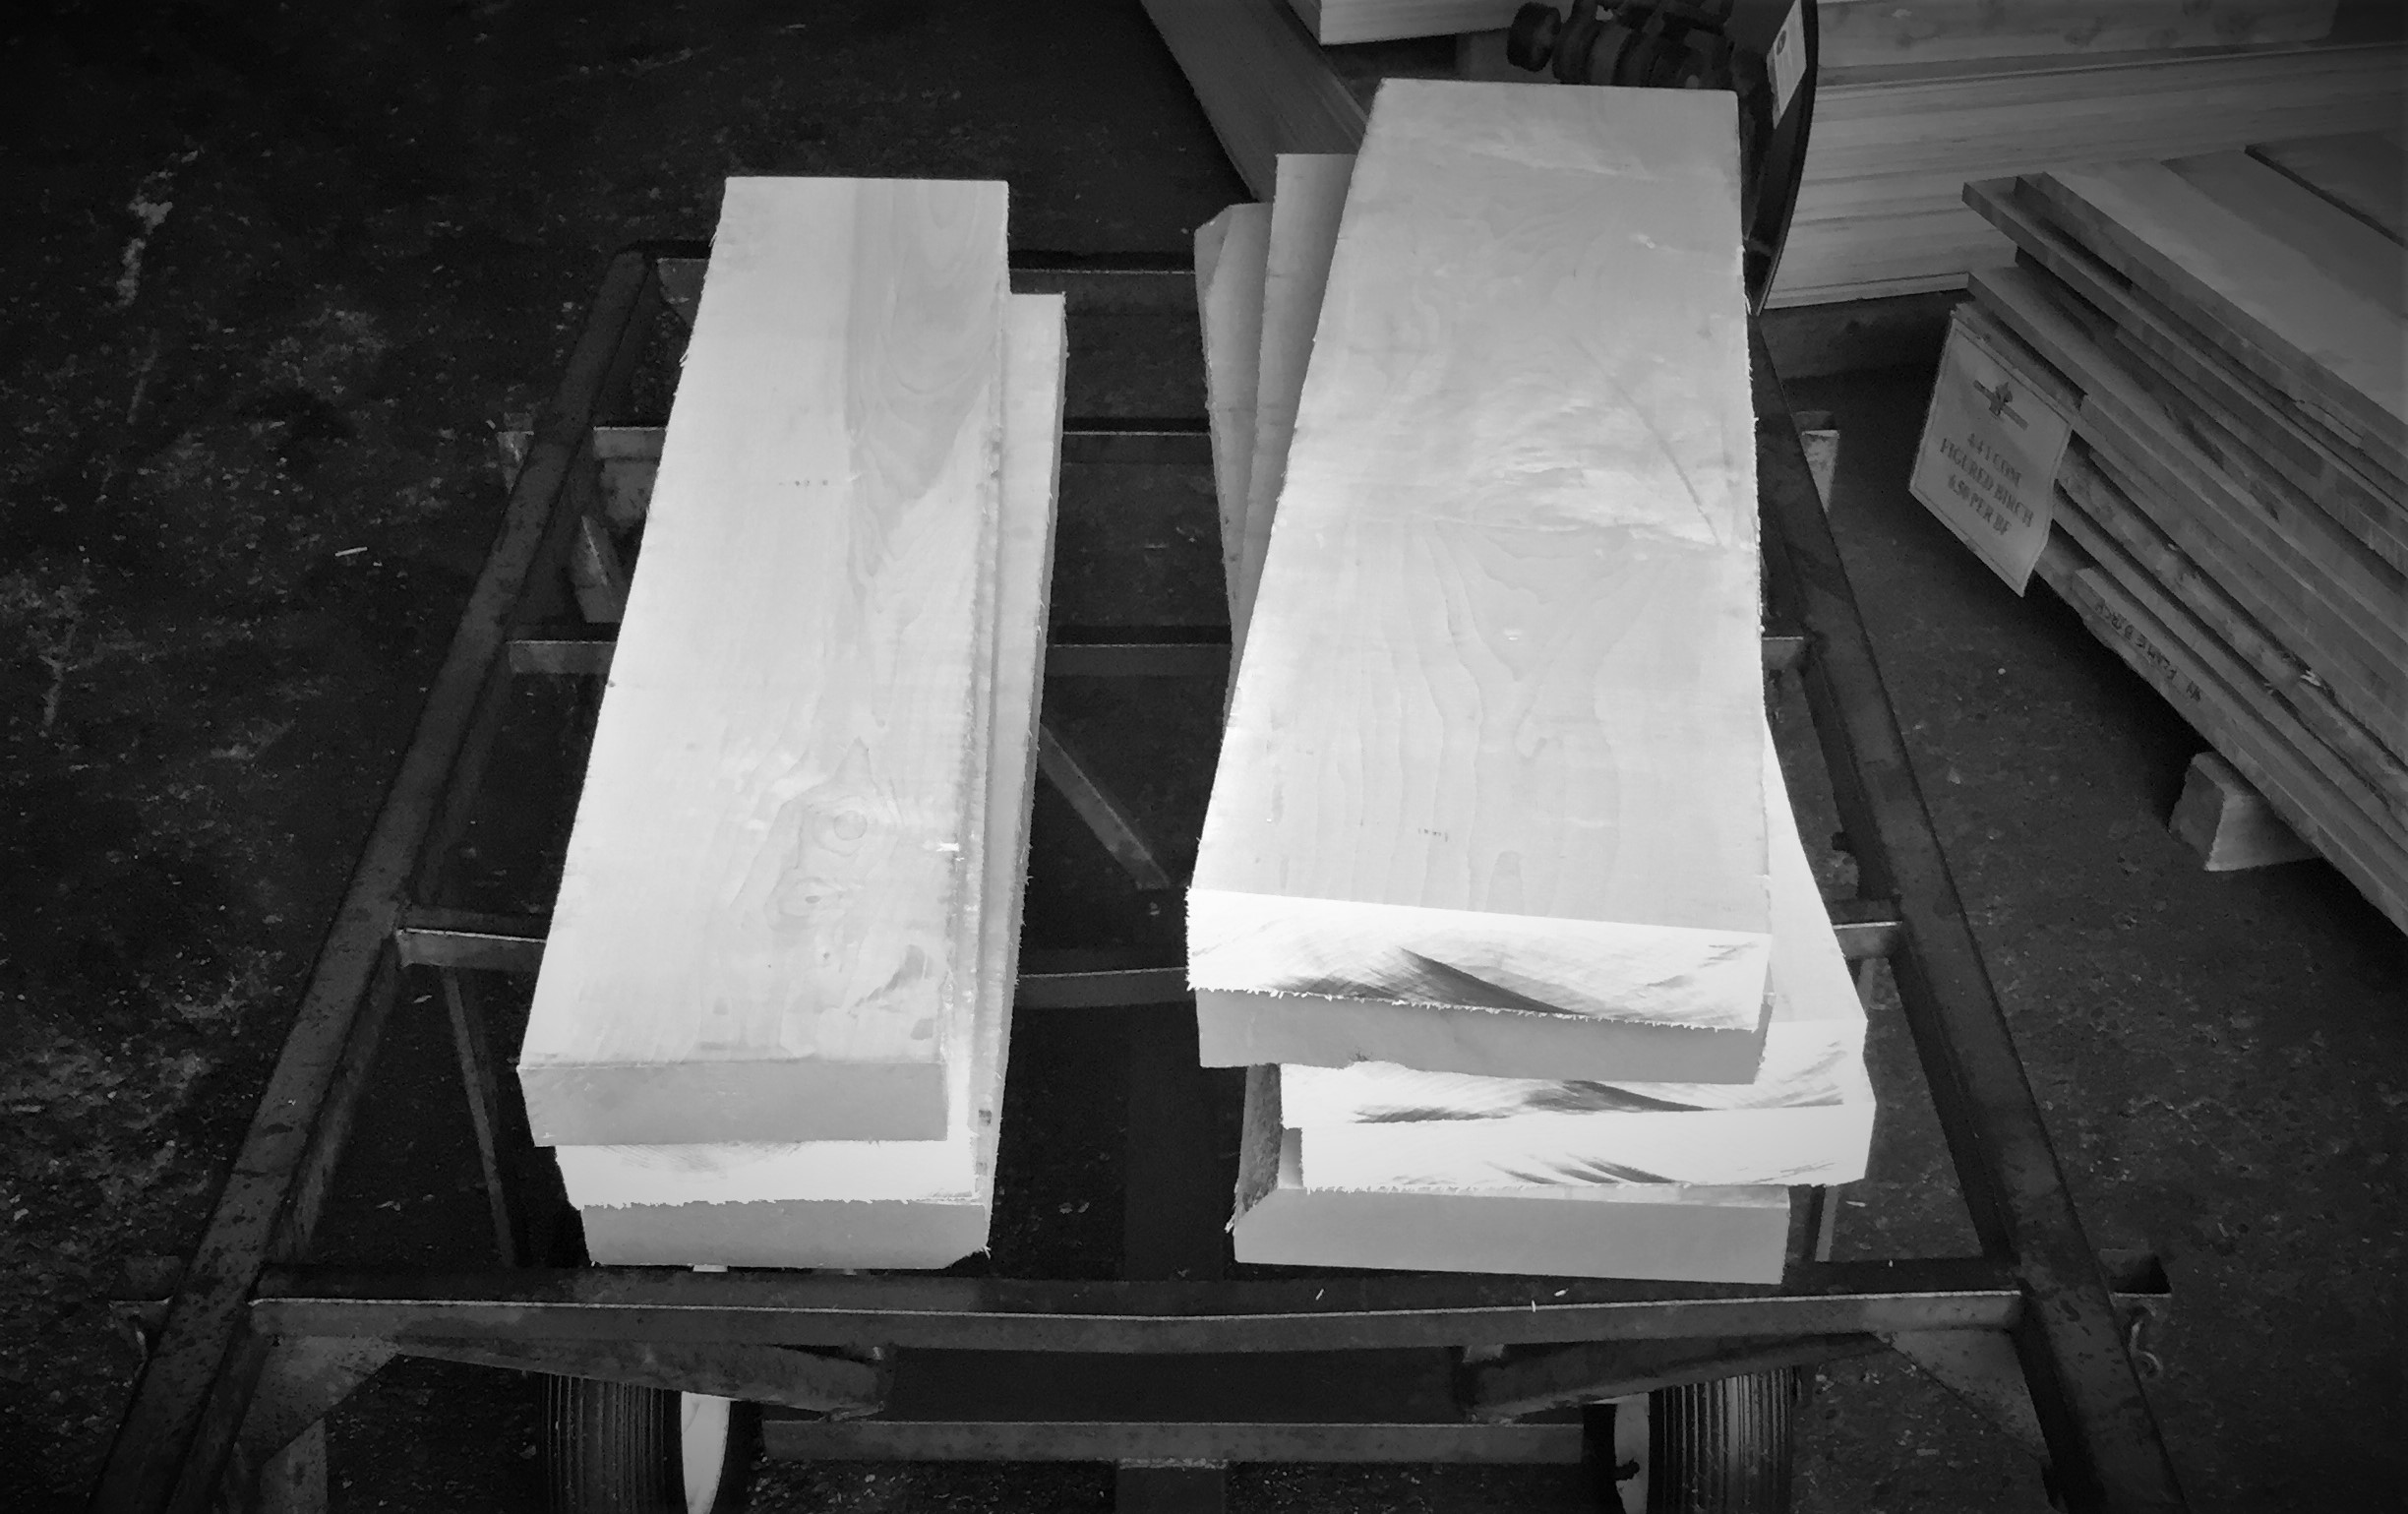
Lumbar Procured and MilledHard Maple was procured from the lumbar yard and cut down into more workable pieces.Upon arrival to the shop, the lumbar was milled down. When making Butcher-block it is as important as ever to have perfect 90 degree angles to glue off of. One half degree of variance in one piece can ripple through a butcher block. I generally buy my lumbar as either S2S or S3S. S2S has been roughly surfaced on each side, but doesn't have a 90 degree edge cut. To work with S2S you need to use a jointer or straight line cutter to get your perpendicular edge, and then work off of that edge to get a 4th perpendicular and parallel edge.
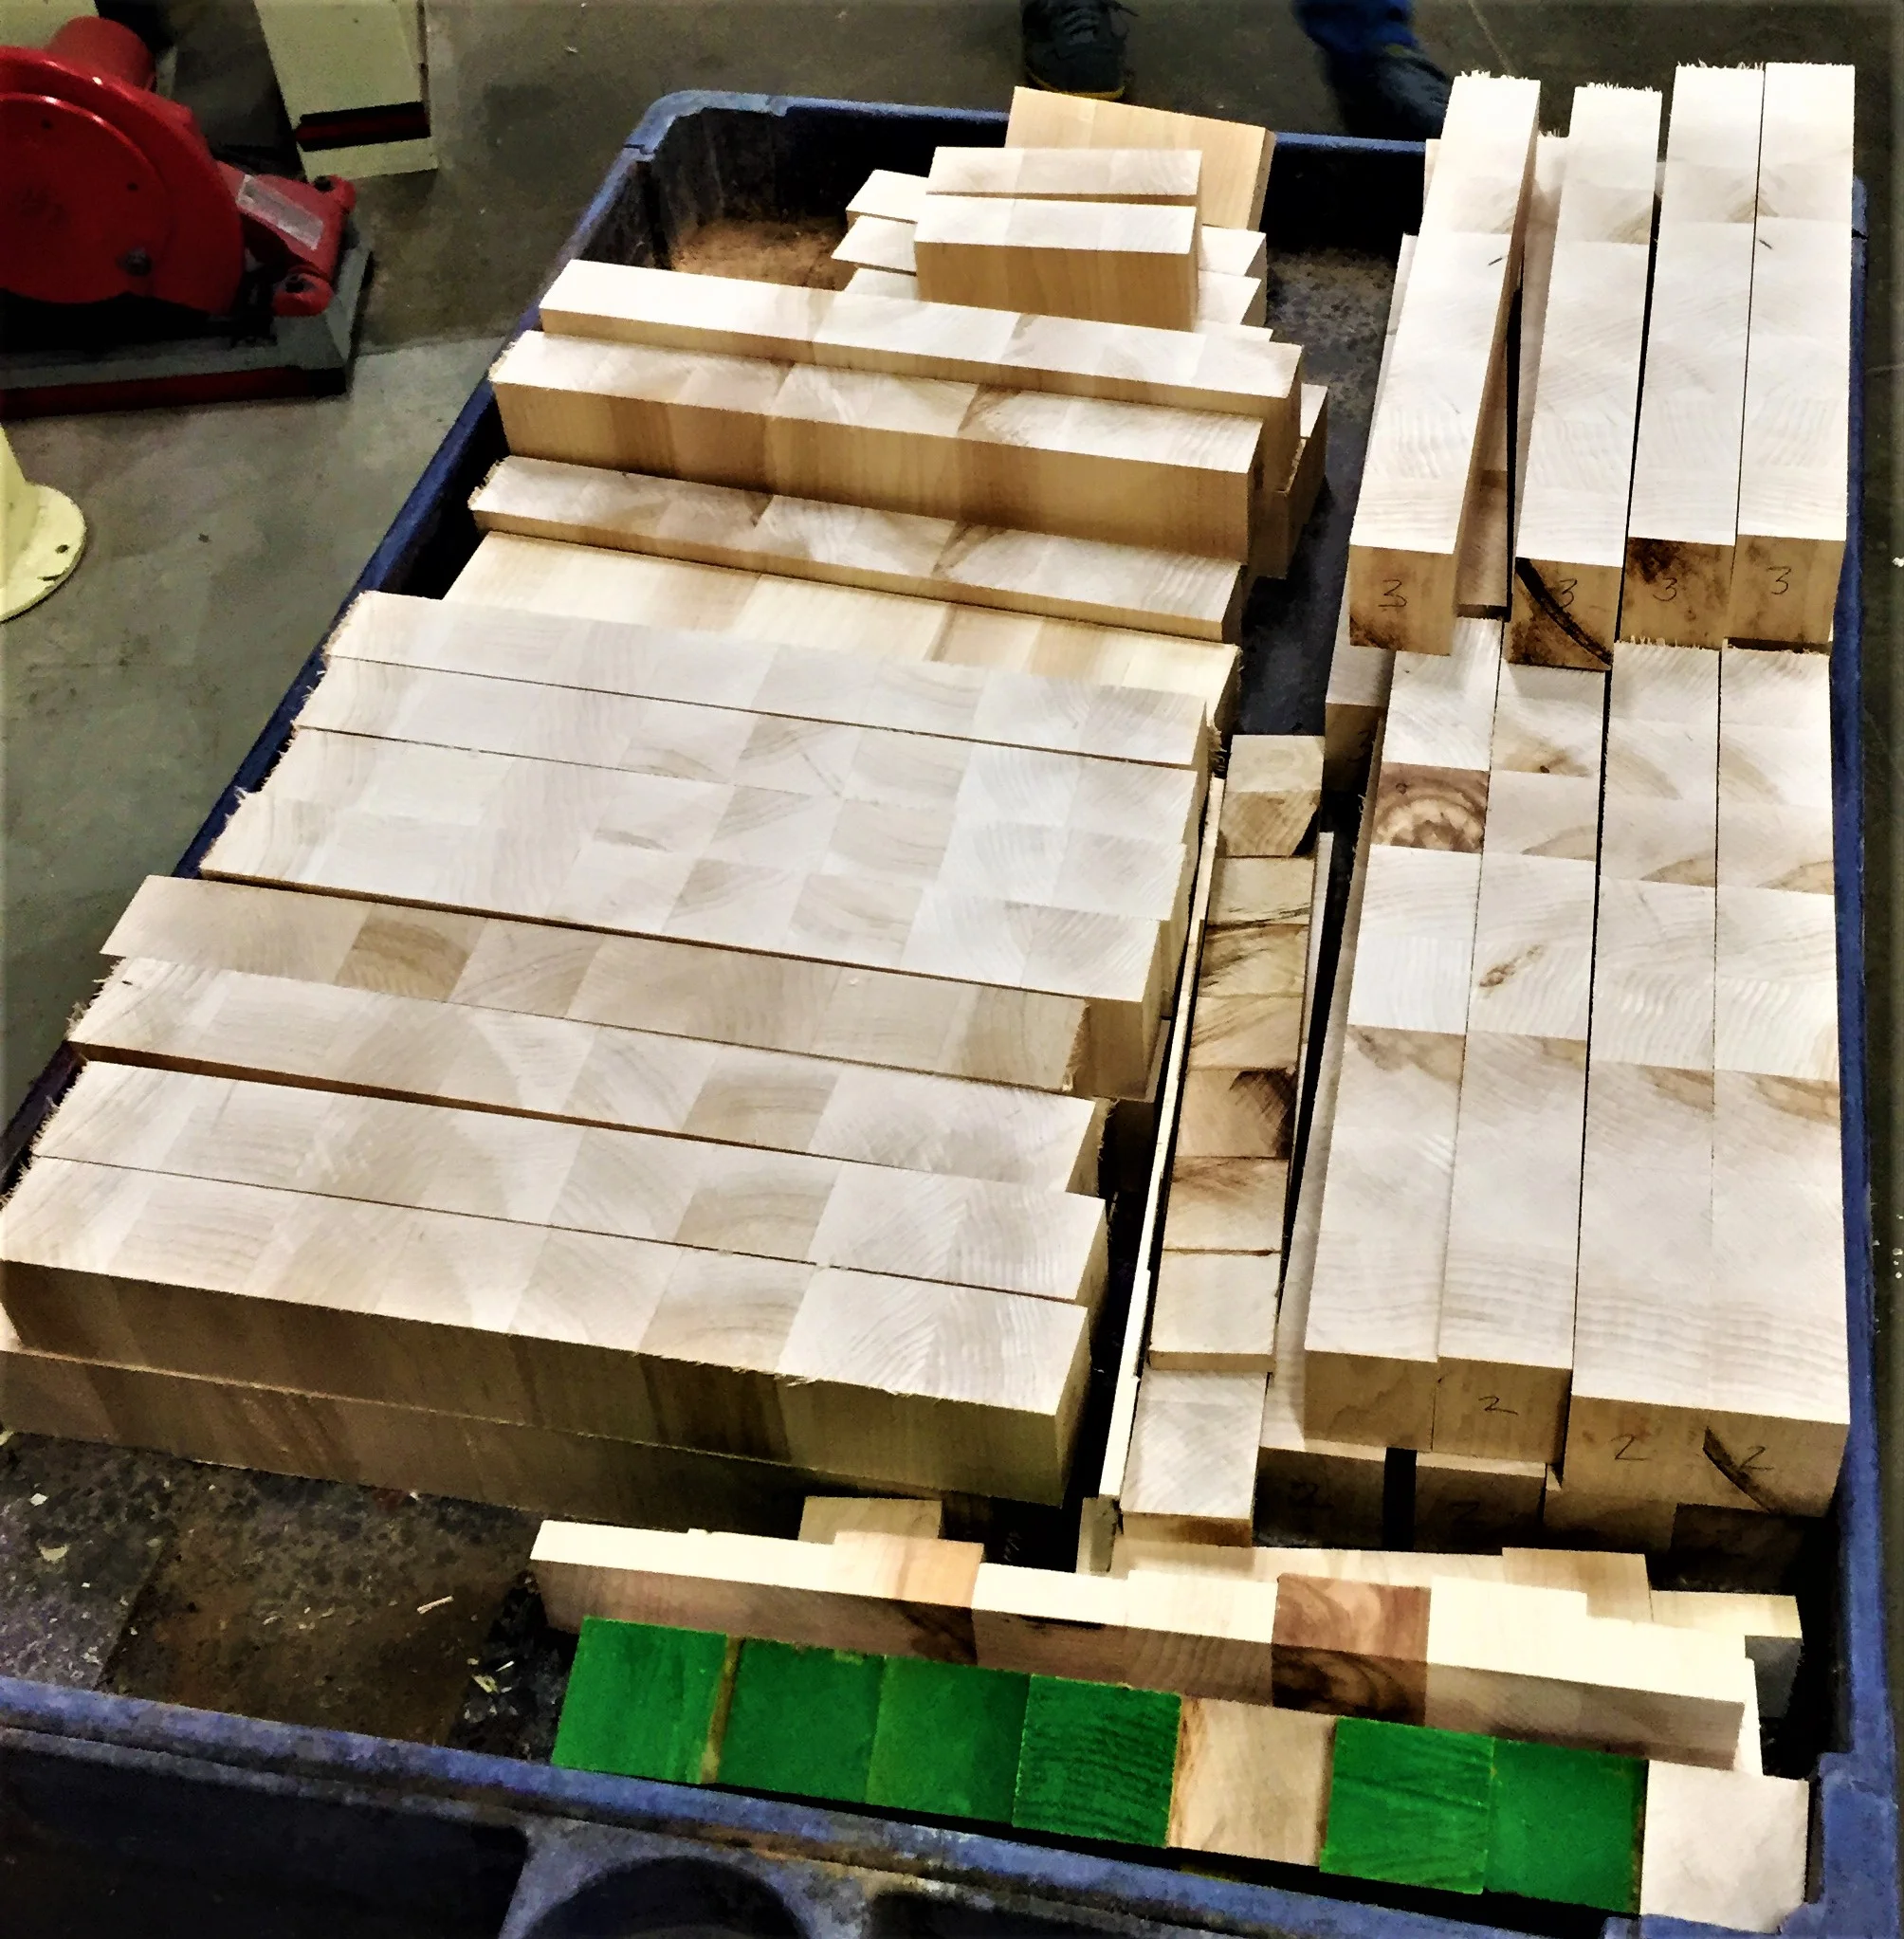
Rip and glueAfter milling, the wood is ready to be ripped and glued up. It is important to be deliberate in end grain patterns at this point because they will define the end surface.
2nd glue stepAfter the rip + glue-up dries, the next step is to rip again perpendicular to your first lines. This creates the blocks we want to have make the end surface. At this point, it's important to orient a pattern for final glue up that will become the surface of the butcher block.
Base fabricationThe base was fabricated out of mild steel which is purchased in 20 foot sections. After material selection, the metal is cut into pieces that will be welded into the structure of the base.
Weld and grindGiven that we were going for a soft-industrial look, we opted to grind down our welds then buff out the grind marks to create a matte metal finish.
Always check your 90'sThroughout the building process it is important to maintain perfect 90 degree angles, and make sure that you're building in parallel and perpendicular. This type of structure is fairly easy to get right, things get harder w/ compound angles that can be found in other pieces such as the garden table and the Walnut and Steel table.
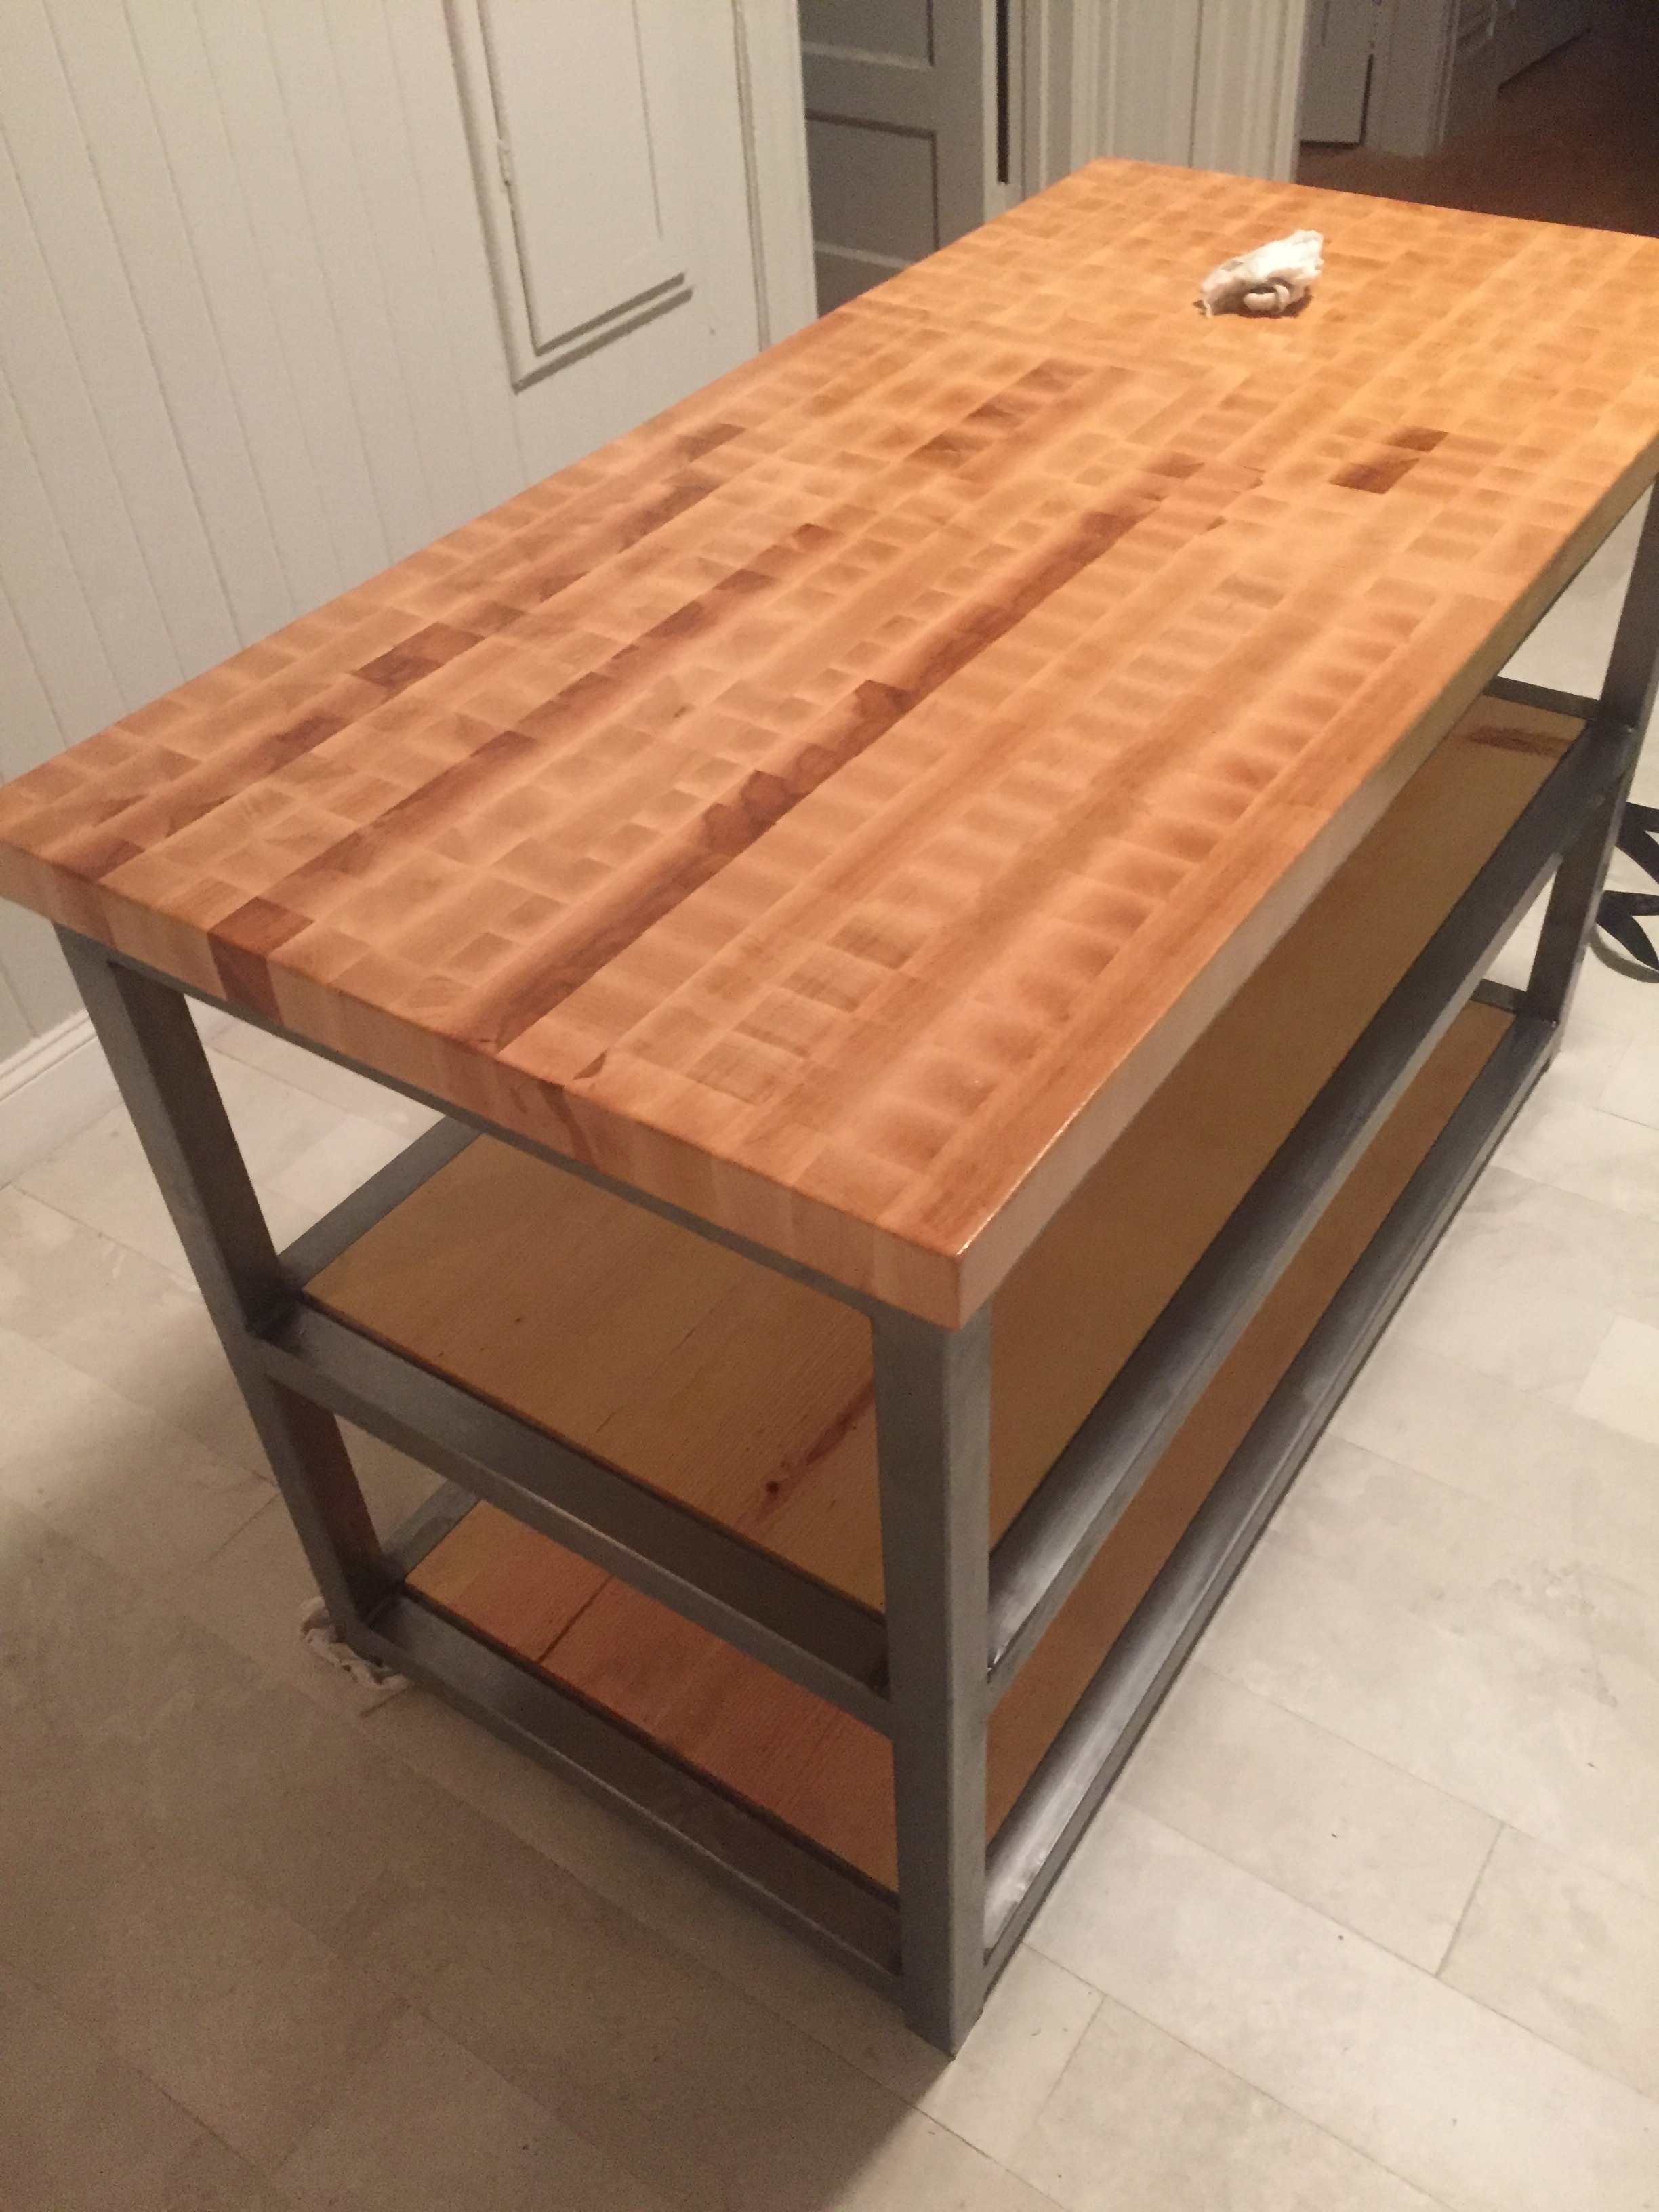
Dry fitAfter the base was fully welded, the next step was to try the top on for size prior to finishing both components.
info
/
1
2
3
4
5
6
7
8
9
10
11
12
13
14
15
16
17
18
19
20
21
·
·
·
·
·
·
·
·
·
·
·
·
·
·
·
·
·
·
·
·
·